Sunday, November 25, 2012

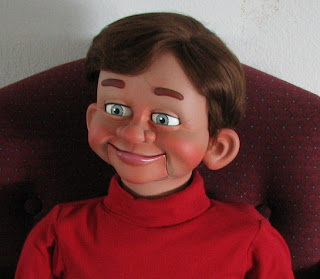
Humpty Dumpty...... Wifey?!?

She's a good egg. She really is! But she has also taken a great fall. I hope they can put her back together again!

Seriously, my wife Cathy, is a bit broken at the moment. A freak accident for sure. She was going out of the workshop last week, tripped, and while doing that little trick, sprained her right ankle. But then while still falling and trying to catch herself, ended up breaking her left ankle in 2 places! Other than that she is just fine! <G> But, ouch!!!

So, needless to say, things have gotten quite a bit more interesting here. I mean I have always appreciated all Cathy does here at Puppets and Props (as well as in our home). But you don't really fully appreciate HOW MUCH someone does until they are completely out of commission. Now I know for sure! <G>

As some of you know, I've had some serious health issues of my own this last year. The best I can guess is that she didn't like me getting ALL of the attention on that front!  <G> But I can surely think of easier, and less painful ways of getting attention.

Of course, I know why this really happened. We've been in the midst of making some changes to simplify things here. We now have just the one line of high quality figures that we've always been known for.  And as many of you know, we are putting the 'cast dummy parts' on hold after Nov. 30th, so we can get caught up on our finished figure orders (our main line of business).

So I guess we were getting just too dog gone close to having a chance to get caught up here! <G> That's all I can figure. Ha! Gotta keep your sense of humor at times like this. That also is good medicine for both my wife and I.

Yes, its going to take a bit longer to get caught up on finished figure orders than we originally anticipated. And yes, the influx of last minute 'cast dummy parts' orders as we get closer to Nov. 30th will be a challenge to fill on top of that. But I am very confident that it will all work out and things will equalize once again.

But more than wishing these temporary time issues would get fixed soon, my greatest wish is for my wife Cathy to be all better again. So let's hope "all the king's horses, and all the king's men"............, well, okay, I'll settle for one good Doctor to put her back together again! <G>

From now on, this is the only kind of fall I want to see (<G>)............


Friday, October 5, 2012

Humpty Dumpty Dummy!

Top notch flight instructor, Larry Baily of Arizona, had us build a nice figure for him back in 2008, and named him 'Max Mach'. He dressed him in a pilot's uniform and the character that he developed for him was that of a retired airline pilot. Pretty cool. Here's a nice pic of Max and Larry ........


You never know what kind of mischief these figures are going to get into after they leave our shop here. I guess Max decided he wasn't having enough fun lately, so he decided to do his 'Humpty Dumpty' impression, and had a great fall! Well, he fell off of a chair onto a tile floor in any case. Ouch!

Fortunately, he was made well enough not to end up in a bunch of pieces on the floor. He did sustain some damage however, and Larry was eager to have me give him some attention, so brought Max to the shop. I fixed some mechanical issues inside the head, and decided it would be best to repaint him. Here's Max sans hair and mustache getting a coat of primer and paint.......


The tricky part of this is that Max is a well established character for his owner, Larry, and is very important when doing a total make over like this, that the figure look pretty much exactly as he did before. Fortunately I had some figure making notes from when I originally made him, and some good reference photos. Here's how he turned out.....


Well, I was happy with how he turned out. But what about Larry, and his lovely wife, Sandra? For them, was Max as good as new? Here's a couple pics of them when they came to pic Max up......


They were quite pleased, and as you can tell, Max was back to his old wise cracking self! But Max did promise not to do any more 'Humpty Dumpty' dummy flight maneuvers any time soon, and that he would mostly try to behave himself! Larry and Sandra said they'd keep a close eye on him as well.

Tuesday, September 18, 2012

A special story goes with this figure...

A special story about a very special young man.......


When I make figures for various customers, I don't always know what will happen with the figure I'm sending out, if it will be used for performance, for fun, or in some special situations......., a noble purpose. As this particular Sparky was on my workbench, staring back at me..........


I got a very warm, fuzzy feeling, as I knew exactly where he was going and how he was going to be used. It was a pretty heart warming story, even 'before' this cute little guy was on his was to his new home. There's a brave young man, fighting some very serious illnesses. Instead of feeling sorry for himself, he decided he wanted to try to help other young ones who have these illnesses.

For me this was a very heartwarming and encouraging story, and was honored to have had even a small part in this. You can read the whole story here....


My wife and I were very touched by the courage of this young man, and we certainly wish Brent the best of success in this noble endeavor. If you want to brighten your day and put a smile on your face, please take the time to read Brent's story by clicking on the above link.

Wednesday, September 12, 2012

Just a quick puppet painting tip....

By far the majority of people who order professional ventriloquist figures from us, order the darker hair colors such as brown or auburn. Matching the eyebrows on with either of those hair colors is fairly straightforward to do. But what about blond hair or gray hair? A little trickier typically. Here's a blonde little boy figure I did not that long ago as an example.........


Now you wouldn't think it would be any harder than painting brown or auburn eyebrows on a ventriloquist figure. But if you take a closer look at those blonde eyebrows, you will see it is not just a solid color painted on there. There are striations of color in order to get a close match like that. I've been asked by a number of people how I achieve that look. Here's the scoop.....

If you paint one solid color trying to match the hair, it will look very flat, bland and barely matching at all usually. Take a look at the blonde hair in those photos. What do you see? If you stare at it awhile you start to notice it is mostly a bit of very light and some darker shades alternating (with some shades in between). That is why one color just doesn't get the effect you want.

 I start with the lighter color matching as best I can, paint the eyebrows and let them dry. Here's where the fun comes in and starts changing the look. Next, I take a 3/8" wide flat artists brush and alter it. I take some thinning shears (used to cut hair) cut the bristles so it is now like a fork with several prongs of bristles (it will paint stripes now).

 I mix up some fairly dark brown paint 50/50 with acrylic medium. I take the altered brush, dip it in that mix of paint and medium, and dab on a paper towel to get off the excess. I use broad strokes at an angle and try not to go over the same place twice. If you get too much on and it gets too many dark lines, you can clean the brush and apply a little bit of the lighter color that you started with to tone it back some.

Between the two colors and the altered brush, you can get the striations just the way you want them. Finally, you may find the match to the blonde hair is not perfect at this point. These were too beige and not the golden blonde I was going for at first. So I poured out a little puddle of acrylic matte medium, added the slightest amount of bright yellow and painted a wash of this over the whole eyebrow. Two coats did the trick.

This same trick works very nicely for gray haired figures as well......


Now on those two figures, I did the same exact technique. And the interesting part was that the figure in the top photo also required the yellow wash to get the eyebrows to match the lighter colored gray hair.  I often will however make the final color on the eyebrows slightly darker than the hair so they stand out (real people often have that anyway).

So just a little painting tidbit from the workshop that some of you might find helpful at some point. I actually enjoy the painting process quite a bit, and find learning how colors work to be quite fascinating.


Wednesday, August 29, 2012

Another figure goes down under.....

I am always amazed at how many far away places we send figures to (somewhere between 40-45 different countries over the many years we've been doing this). We get to know people from all over the globe. Australia has quite a few of our figures now (and kits too!). We got a nice note and some photos from some new customers 'down under'. Here's what they said.........


"G’day, Mike and Catherine, well after a long but exciting wait, Sparky has finally arrived in Victoria, Australia, after his long journey from Arizona and he is in good shape, all working perfectly and actually speaking with an Ozzie accent “mate”, it is amazing how you made that happen.

I would just like to say thanks for getting Sparky ready for me and Jacinta, as this was a birthday present from Jacinta to me, and she actually made me up a birthday card with Sparky’s photo to give me on the day. Jacinta is very happy also with how he looks and moves, etc. I will get some sneakers for him and maybe a check shirt half open an the neck to make him look like a trendy kid about town but with a bit of attitude!!

I have enclosed a couple of photos for you to see how happy he is in his new home in Oz and how well we are getting along together, you will also see he has a new friend here “Bucko” who is getting a bit of wear and tear on him now, still fairly cheeky and needs a bit of a refresh of colour on his face, and I was wondering what paint or product you could recommend for me to give him a bit of a make over ???? I would appreciate your suggestions.

Are there any other Sparky’s in Australia that you know of ?

Anyway guys, thanks again and please respond to this email, and we will keep in touch, we may come and visit when we are next in the US ?"

Cheers Eric and Jacinta
  
Always great to get such nice emails from the folks we meet this way. Here are the photos Eric sent.


 Well the smiles on their faces says it all. Looks like Sparky will be very happy in his new home. And yes, teaching him how to speak 'Ozzie' before getting on the plane was the hardest part of all this! <G>

Wednesday, August 22, 2012

Winker Mechanics book - In Print!

Sorry to be so long between posts! I had some health issues that got a bit serious, slowed me way down, got me behind in everything, and I finally ended up in the hospital and had a surgical procedure. Doing much better now.

Well the title of this post is fairly self explanatory. My popular book, 'Winker Mechanics Can Be Fun?!?' is now available in hard copy. Some people like PDF Ebooks just fine. Others want a full printed version. Some like having both, as my other figure making book has been for some time now.

In any case, my 'Winker Mechanics Can Be Fun?!?' can now be purchased as a full color (inside and out), quality printed soft cover book. I have to say, it is very nice! Here's a shot of the cover........


The digital age is incredible. I sent all of the digital information of the complete book to my printer on a Wednesday, and on Friday I received the 'proof' copy of my book in the mail! Awesome!  I reviewed it completely just to make sure that all was okay, made some changes, and submitted the final draft ready to publish. The printed book can now be ordered here............


Well just a short post for now to let you know I'm still alive as well as announce the printed version of my winker book. I will try to post more often now that I'm feeling better. Thanks to all who subscribe and read my blog!

Saturday, June 30, 2012

Makes It All Worthwhile!

Making quality professional ventriloquist figures full time is a lot like hard work, with a lot of painstaking attention to detail. Some days you scratch your head and wonder if it is all worthwhile. You get one of these figures finished, get 'em all packed up and sent on their way to a patiently waiting customer. You wonder if they will notice and appreciate all the time and effort you put into making their quality figure.

Then, after a few days when the figure has arrived, you get an email or a phone call from the customer. Then you know it's all worthwhile! Here are a couple of happy customers comments right after they got a chance to look at their new figure for the first time..........

"Hi Mike,

Eddie arrived on schedule, although I had to leave as soon as he arrived.
I'm back and looking at a masterpiece!  The colors on Eddie's face and hands
are so vibrant, yet realistic.  His facial features look great from every
angle.  When I saw Eddie I was more overwhelmed than when I viewed
Michelangelo's statue of David.  David met my expectations; Eddie far
exceeded all my expectations. Additionally, Eddie winks, blinks, moves his
eyes, raises his eyebrows, and looks like he is about to speak.

With much appreciation,
Faye

P.S. If I am this pleased with Eddie, I know Ember will be wonderful too!"

 Here's the other one from ventriloquist Bob Isaacson, a very familiar name to many in the vent community....

"Hooray !...he's here Mike.  Safe & Sound.  I don't know where to begin....  Sparky is perfect; I'm sure the little kids ( preschoolers) at my Church are really going to like him. He is a very charming looking fellow. Going to get him properly dressed in "kid type" clothing.  Even arrived a day early so I can get him properly ready.  Mike, I can't think of enough superlatives to describe your work.   Everything, I mean , everything is done to perfection.  The controls are wonderful & I appreciate the frontal eye control. Also  the head lock is great. I always use a head lock on my figures ( remove it when figure is in action). Your lock is so sophisticated in design, but simple to use.  The hair, eyes & makeup (paint) are also terrific. I really appreciate all you've done for me & will certainly recommend your work.  Not only perfection, but price is so reasonable.  I'm hoping to take Sparky to the convention, so folks there can see your wonderful work.  As soon as I have photos, will send you copies.  Many, many, thanks Mike !   as "they" say  " you're the go to man".     Sincerely,  Bob"

Here's a pic of Bob's Sparky in the workshop, just before he went out the door....


Here's some pictures of Bob with Sparky and some of the kids at the school.......


Bob Isaacson further said when he kindly sent me these pictures...........

"Hello Mike… Here's the photos the preschool teacher took of the younger kids with Sparky. She thought the photos would be better in the classroom. Those "little kids" really took to Sparky. He talked to them for a while, then the teacher had me sit down & the kids gather around.  You can see by their faces, that they loved Sparky. He was truly a big hit with the children.   Another Mike Brose success story!...  again Mike,  My thanks !    Bob"

So, as you can guess, I keep all such comments on hand, to remind me that after all the hard work....., blood, sweat and tears...., and other such fun, that figure making can be, that it is surely.....,   ALL worthwhile

Tuesday, June 19, 2012

Epoxy Putty on a diet!

For a number of years I had been looking for a light weight epoxy putty, that would work basically like Magic Sculp or Apoxie Sculpt, but the cured material would be light in weight. Epoxy putties can be a great material for altering ventriloquist figure heads or puppet heads, but the problem has always been, the more  putty you add to the head, the more it is going to weigh!

 I always try to keep up with what is going on in the mold making and casting industry (I've been doing mold making and casting since the latter part of the 1960's), and so I came across a new product that looked promising. Its been so crazy busy here with making cast parts and finished figures for customers, I didn't even get around to ordering it for quite awhile, and then several weeks passed before I was able to try it out.

I was somewhat skeptical before trying it, as I have tried so many dozens and dozens of other new materials over the years, and some few turn out to work exactly like you hoped they would, but many others have been a big disappointment and end up getting tossed. So how did this one work? Very nicely! I was pleasantly surprised. It is made by Smooth-On and is their newer Free Form Air.....


Here's my review of Free Form Air:  First of all, Free Form Air costs less than Magic Sculp or Apoxie Sculpt. It's like 2 quarts of material for $25, which will go a long ways. Apoxie Sculpt is $35 for about the same volume of material, and Magic Sculp is around $40 for about that much material (you get a little more I think as you get 5 lbs. for that amount). In any case, the Free From Air appears to be a good value.

Next, it is very easy to mix. Much easier than Magic Sculp or Apoxie Sculpt or any of the other epoxy putties I've tried for that matter. Those are a little bit of a workout to mix in comparison. It comes out of the container very easily and is light and almost fluffy. It almost feels like you are not holding anything at first. But it's consistency is such that it will mix and blend at a much faster rate than the other epoxy putties.

Cured Properties: One of the first things you will notice after it has cured, is that it is not a hard as the other epoxy putties (it is only Shore D 50). Magic Sculp is Shore D 80, and from what I can tell, Apoxie Sculpt is in about the same range (fairly hard when cured). As a comparison, Free Form Air is somewhat comparable to basswood as far as relative hardness/softness. At any rate it is softer than what you may have worked with before.

In My Opinion: Because it is light in weight, you can use much more putty to alter a figure's face (at least twice as much is my gut feeling) and not have the head be too heavy. On the flip side of the scale, I would say it is great for altering a face, but there is a caution regarding other uses. Example: Some like to make heads completely cast from an epoxy putty material. I even show that on my web site as a way to make a head. Here's the reason for the caution.....

When I test a casting material, I always test its breaking strength. I need to know if  'push comes to shove', at what point will this material break? I create test samples about 1/8" thick and then see how much force it takes to break the sample piece. It takes a pretty good force to break a piece of cured Magic Sculp or Apoxie Sculpt. In the tests that I did, Free Form Air has about 3/4 to 1/2 the strength to resist breakage as either on of those.

For this reason, I would not recommend making a cast head with it unless it was properly reinforced and/or cast pretty thick (probably around 3/8" minimum). So closer to the thickness of a basswood head (basswood may actually be more like 1/2" or so in places). Otherwise, I think the casting will be too fragile. However I haven't actually cast any full heads in it yet to verify what might be required. I'm just putting that caution out there based on my destructive testing so far.

In any case, I think it has the potential to be a great material for a light weight alternative to the other epoxy putties, and thought I would share my preliminary findings on this product. It could make it much easier and more feasible to make a custom of or semi-custom face over an existing head casting using this light weight material instead of the heavier epoxy putties you might normally use.   

Tip: When you first mix the material it is pretty much too soft to work with in my opinion. Let it set up a little (approximately 30 minutes) before trying to sculpt with it. It will have more body and be easier to sculpt when it gets slightly firmer in consistency.

Well, I hope you find this review of Smooth-On's 'Free Form Air' of benefit. I will be testing it out further as time allows.

Tuesday, June 5, 2012

People kept asking, so......

Since 'Sparky' was first introduced as a finished figure, we have had numerous requests to make him available for purchase as a quality kit head. We have listened to our customers and have made this a reality.


You can now purchase this top quality head casting with Sparky's unique, premium sculpted face, which is brimming with personality, and make your own quality figure. You can read more about him on our head casting page.....


The Sparky head, as with all our head castings, is made with our unique head casting process. You can read more about that here.....


Kit includes the Sparky head, matching trap door, jaw with brass axle and easy install metal collars for positioning. I've also added some extra flanges inside this unique head for gluing in a pulley axle for a cord controlled jaw. So there are 3 sets of flanges (eye tray, jaw axle, and jaw pulley axle) already inside the head for solidly gluing these items in place.

Also, you don't have to glue his ears in place. Even though Sparky has ears that stick out quite a bit (that's part of his personality and fun look), I worked very hard at creating a special mold (core head molds are special to begin with) where the ears are cast as an integral part of the head casting. Because of this, they are rock solid and aren't going anywhere!

That was a real challenge, but it was very important to me so I kept pushing myself until I got it down. Also, there are some pilot holes pre-drilled in the eyebrow area, so if you are going to install raising eyebrows, you don't have to guess where to drill the holes. 

So, take advantage of all my hard work (I do a lot of this to make my own figure making easier, but I know others appreciate it too!) and check out this new, way cool, Sparky head cast kit!

Monday, June 4, 2012

Sutffed legs with cast feet - attached!

A lot of our kit customers like our cast feet. And a lot of them like our stuffed legs as well. Quite a few have asked if they could get the cast feet already attached to the stuffed legs. We, of course, have said, "Sure. We can do that! No problem." And we make them for them!

To makes things even easier, and so customers don't have to ask for them, we now have these available to easily order on our Cast Feet and Stuffed Legs web page.....


Just click on the photo or on the above link and that will take you to that part of the web page that tells about them. 

Our customers do some amazing stuff!

Sorry to be so long between blog posts. I see some light at the end of the tunnel here, but its still going to be crazy busy for a little while yet. No complaints. I realize I am very fortunate to be this busy.

I always enjoy hearing from customers and seeing what they have done. Customer and colleague, Rey Ortega sent me a nice email awhile back. I just haven't had time to post this until now. Here's what he said.........

"Dear Mike and Cathy,

Hope all is well with you two.
Attached are pictures of my new figures, The Scat Cat and Duh Wayne, the partied out tourist using techniques from your book.
Thought you might like to share these with your customers.

All the best!

Rey"


I'm always tickled when people tell me that my book has been of help to them. Of course, Rey is also very talented and that really shows in his finished work. Rey has also done a video diary of working on 'Duh Wayne' on Youtube ..........


Great job done on these figures Rey! Thanks so much for sharing!! Keep in touch and let me know how it goes with your future figure making projects.

Saturday, April 7, 2012

Always more than one way to do something. . . .

Having a number of other figure makers dummies (some from contemporary makers, some from makers of old, and everything in between) come through the shop over the years, for repairs, maintenance or sometimes duplication, what I have to marvel at is how many different ways there are to do the same thing.

I've gotten to see the inside of a lot of ventriloquist figure heads, and seen a lot of interesting mechanics. And from some of the feedback I've gotten, mechanics is one of the things a lot of people are interested in when it comes to figure making.

I was looking through some of my archived photos here, and a couple photos I had to stop and look at again, thinking about how there is always more than one way to do the same thing. Here's the inside of one of the figures I was looking at....


As I recall, this is a Ray Guyll head, a reproduction of a vintage figure. What I was particularly focusing on in this case were the pulleys or the way the cord for the winkers and such are handled. In this figure the cords go up over styrene tubes which rotate over brass rods. I've use this method myself on some of the figures I've built, and it can work quite nicely.

The advantage to that style is the tubing is easy to find (local hobby store), easy to cut and install, and does not require a cord containment set up like regular pulleys usually do. Speaking of which, as a comparison, here's a pic inside one of my heads with regular pulleys.....


Regular pulleys can be more challenging to install as you have to have them fairly well aligned or else the cords will rub and make noise against the pulleys. And you should have some type of cord containment over the pulleys (copper wire in the photos above), lest the cords jump off of the pulley at some point. 

The second biggest challenge with this style is finding some suitable small pulleys. I figured out how to cast my own several years back, so I could have the exact right size pulleys with the diameter of pivot hole I prefer. 
 
Another way to handle the actuation of winkers is with a rocker or lever (like a teeter totter) as shown in the photo below (the gray metal objects). . . .


That's a Rick Price head that has fancy cast rockers, similar to what Chuck Jackson did. The rocker method typically works better with cord controlled eyes. If you look at the photos with the regular pulleys above, that head has rod controlled eyes. The cords coming down off of the back end of the rockers will likely interfere with the movement of the rod control for the eyes.

This is one of the biggest lessons I've learned with figure making over the years:  Anytime you try a new animation or a different version of an animation you've done before, you have to make sure that this new animation is compatible with the other existing mechanics inside the head. Sometimes a very small change can create an interesting or challenging situation.

I have done rockers, and I have done a combination of rockers and pulleys in some of the heads I have made (like pulleys for the winkers and a rocker for the raising eyebrows). As you play with these different styles, you will find advantages and disadvantages to each method.

In any case, this is just one example of several ways to do the same thing. And the above methods are surely not the only way to actuate winkers. If you ever get a chance to look inside some Selberg heads, you will see some different methods yet.

I enjoy studying and developing new ways of doing mechanics inside dummy heads. But mechanics are only one aspect of figure making.  What other aspects are particularly of interest to you? Would love to hear from you.

Sunday, March 11, 2012

Handy Shop Fixtures - Part 2

In my last post, I showed you a shop fixture that I use for safely storing various heads that are being worked on. I ended with the question, "when you are working on a head on your workbench or table, what is a good fixture to set the head in so it does not fall over easily, and is easy to use?" That is the subject of Part 2 of 'Handy Shop Fixtures'.

I call it a head holder, but you can surely give it what ever name you like! But that is what it does. It holds a head steady on the work bench while you work on it or temporarily set the head in there while you grab your tools, mix up epoxy, or what ever.

It is very inexpensive, simple to make, very stable (very hard to knock it over) and provides more room around the fixture than some other head holders. Everyone has to find what works best for them, but this is what I use and I have found it to have many advantages over other styles that I've used or seen others use. 

Here's a picture of two of the head holder fixtures I use in the shop pretty much daily. . . .


The head holder can be made with just one hole for a single control stick size or can be made with several holes to accommodate more than one size of control sticks. As you can see it can also have other smaller holes drilled here and there to hold various parts so they don't fall off the workbench or get lost in the shuffle. 

The wood bars on the sides is where the stability comes in. You don't realize how well these work until you actually build and use one of these head holders, and see for yourself how steady they are on the workbench.  I've never had one tip over yet!

Also, I find that the open areas on the front and the back of this style head holder gives more room when moving them around the bench, or putting various tools in front of it, ready to work. This design has the same stability of a large square base, but still has that open feeling to it and is nice to work with.

And this style head holder has a low enough profile that you can easily set most styles of control sticks in place even after all the levers are installed. . . .


And finally, you can easily clamp the head holder fixture to your work table when you need some added stability. . . .


It's a little hard to see in that photo, but the top of a 4" C clamp is clamped around the front left part of one of the side stabilizer bars (the gray object in the middle, bottom part of the photo). I like clamping the fixture in place on the work table when attaching and grooming wigs. Even though the head might not topple necessarily, this keeps the fixture from sliding around, and provides a little extra insurance, just in case.

Want to build one for yourself? I have made a measured drawing and some notes on how to assemble one (or more!) of these handy dandy head holder fixtures. Click on the link below for a free PDF. . . .


You can also easily clamp one of the side stabilizer bars in a bench vise (solidly mounted of course!) and you can then have a head held at various angles (like horizontal, or at 45 degrees) while some glue dries inside a head. Overall, I have found these to be extremely useful in my workshop. I hope that you will find them of good benefit as well!

Saturday, March 10, 2012

Handy Shop Fixtures - Part 1

When working on building professional ventriloquist figures, one can easily have several projects going at the same time. While working on the heads, you might do a few steps on one head, set that one aside temporarily, and then work on another head for awhile or another part of the figure.

Where can you put the heads you are not working on that is safe and secure, and out of harms way? Nothing worse than having a head topple over and sustaining some damage, after all you hard work on it. I have a special rack that I made several years back, just for this purpose. Here's a picture of it with several heads on it in various stages. . . .


The heads are up out of the way, in a corner of the workshop, safe and secure, but easily accessed when I am ready to work on them again. This head rack has places for 6 heads. You could just as easily make it for 2, 3, or 4 heads, what ever your needs are. Normally I cover the heads with plastic bags to keep the workshop dust from settling on them, but took them off for the photo.

Back behind the heads is the main shelf area which you can store some of the parts for the figure being worked on if you wish. You could surely make a deeper shelf and have more storage room if you wanted. This size works pretty good for me.

I have found this head rack shop fixture so handy, that I thought I would share it with those following my blog. I have made a measured drawing of the head rack with a few notes to assist you in putting it together. Click on the link below to download a free PDF. . . .


Having the heads up and out of the way also makes more room on your workbenches or work tables. But when you are working on a head on your workbench or table, what is a good fixture to set the head in so it does not fall over easily, and is easy to use? I will show you what I use in Part 2 of 'Handy Shop Fixtures'. Stay tuned! . . .

Saturday, February 11, 2012

Simpler can be better. . .

 I did a certain crossing eye mechanism a little more than a decade ago, and experimented with this style for 2 reasons. One, just to verify I could do it (its a little fancier than some and tested my soldering skills), and two, to verify its usefulness in a figure. Here's a few pictures...


Basically it's a telescoping mechanism, where a brass rod rides inside of a brass tube, and has a return spring. There are also 2 brass rods soldered to the tube and project out the back of the mechanism to connect to an 'L' shaped eye rod control (see example here).

Cord is tied around the rods on the back of the eyes, and go through 'screw eyes' in the sides of the head. When the cords are pulled, the mechanism telescopes like in the 3rd photo above, and the eyes cross. When released, the spring pulls everything back into the normal position, and the eye are no longer crossed. 

Does it work well?. Yes, flawlessly. Is it practical or worth the trouble? Debatable! Often times simpler is better. The photos below show a much simpler method of achieving the same thing. It is based on one of the synchro/self-center mechanisms shown in my book, that uses two springs off the back of the eyes........


To that basic arrangement, screw eyes are added to the eyeballs, and cords are attached that will pull from either side through screw eyes in the sides on the inside of the head. See photos below....

 
When the cords are pulled, the springs allow the eyes to turn inward thus crossing the eyes. When the tension on the cords are released, the springs pull the eyes back into the normal position (like in the photo above). See photo below of the eyes being crossed....


The mechanism is very simple to make, takes very little skill to install, and works great. It self-centers the eyes, provides the synchronization of the eyes and allows them to be easily crossed.  Back in the late 1990's, when I met with figure maker Rick Price to discuss different mechanisms, this was one that we talked about.

There were certain mechanisms that Rick and I discussed at some length, but were held back at the time from being published in my book for various reasons (sometimes out of respect for a certain figure maker). Its been so long now, I can't remember why this one did not get included.

Truth of the matter is, I've had many discussions with those learning figure making over the past decade or so, and have shared this simple method with them, and I know they have shared it with others as well. There's a number of figure makers currently using this method. It was actually in use for some time prior to when I first learned about it.

In any case, it's a good example of the old axiom that, 'sometimes simpler is better'!